Christmas Card v2

Last year I sent out our family Christmas Card to about 50 people, but I included a little bit of a challenge to add a little bit something to it. It was all in fun, and I hoped that some would find it interesting.

v1 – 2021 Retrospective…

What was it you ask? Well it was Bitcoin. One the back of everyone’s Christmas Card I attached a sticker that looked something like the following:

It was a Bitcoin Private Key, that was customized partially with their name, of which I had just deposited a token amount of bitcoin, that they could own and play around with. In the end, about a handful of people were able to figure it out it was Bitcoin and collect their reward.

So, on to year 2…

v2 – 2022

Being pretty happy with the 2021 idea, but wanting to see more people involved, I decided to evolve it a little more for year two. After some thought, I still liked the idea of Bitcoin, but I wanted to make it more approachable, so I decided to do more of a game, in which you could play and then win Bitcoin.

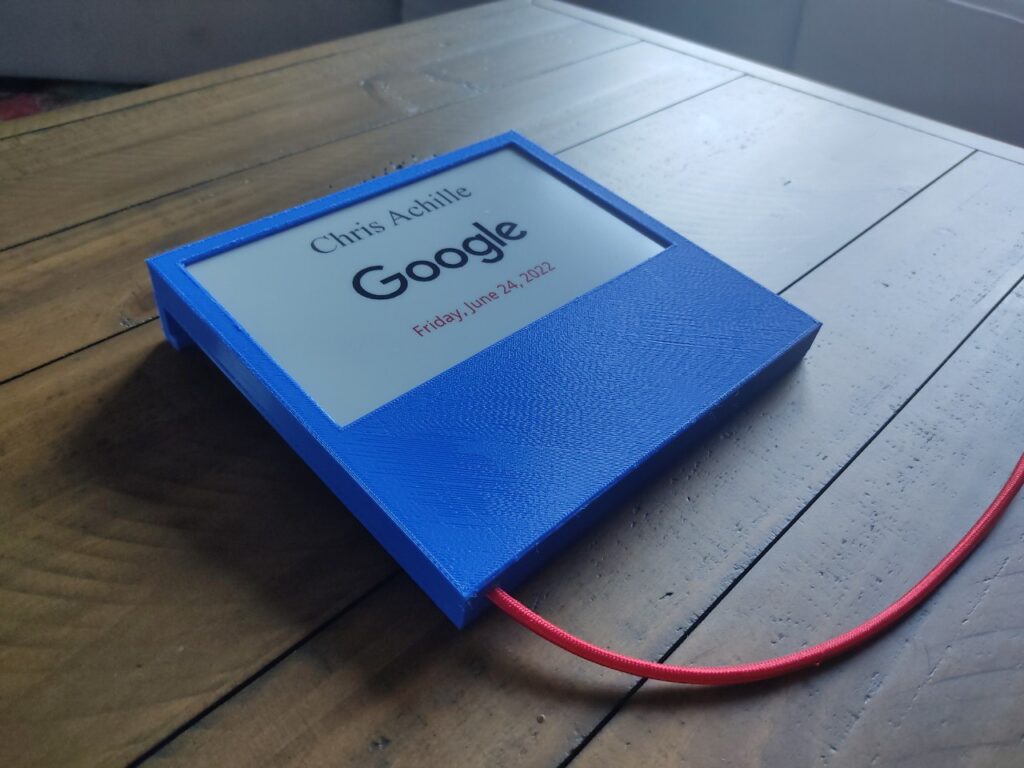
So, what does it look like? Well it ended up looking like this:

As you can see, everyone of the recipients got a customized link, that would take them into the game, in which they could answer some (mostly family related) simple questions. It was an opportunity for me to say “Hi” with a little bit of a custom message beyond the postcard.

When you would visit, this is what the site looked like:

Not being much of a designer, the site above is what I came up with. When you first log in to it, it presents you with a simple welcome message, including a custom short You Tube video wishing everyone Happy Holidays. Following that, it takes you right into this experience, where you start answering a series of questions moving from one level to another.

At each level you get an option to answer the question, or to skip on to the next level. If you answer correctly, then you earn Bitcoin, and it is deposited into your account. At the end of the game, you can then check the balance of your account, and then just transfer out the money that you have earned.

And, that is it as they say. If you are interested in knowing a little more about how it all worked, then please read below, and if not, then I hope you enjoyed, and we will see what is to come in year three.

Behind the Curtain

There were three main components to make this work, and they are the following:

  • API/Data – Backend API and data which kept track of which players were on what levels, and to be able to react and response to their answers.
  • Website – Static website which presented the Game to the user with the data from the API included.
  • Bitcoin Scripts – Scripts that were capable of taking bitcoin from one account (“the bank”) and then depositing it in other accounts for the different players.

This will all eventually be hosted on GitHub or some equivalent, but I have not done that yet.

API/Data

Being more of a backend person, it all starts with the data. Here is the key data and concepts that I really needed to keep track of:

  • Invites – Who was invited (eg. their name), what was their current progress in the game, and some other associated metadata such as the account that I would deposit their earnings in (eg. Bitcoin address and private key).
  • Levels – The questions associated with each one of the levels, what the acceptable answers were, and what the prize was for getting it right.
  • Stats – Some global stats such as how many people have won each round.

For simplicity sake, this was all stored in json files. Here is an example of one of those files.

<.../invites/test.json>
{
  "name": "Smith Family",
  "bitcoin_address": "1G2zt786BsvKJXAvTamW3Bds64e6pcQBMx",
  "bitcoin_private": "L22zGSFr75Cix3h8BUKxfyRUTpxEnNC442pvjnwP2F2GNEppUKuc",
  "level_current": 1
}

That was the data part, but in addition there needed to be an API. Following up on some previous work I had done, I made a simple JSON Python-based app that responded to requests for data, along with submitting of answers to progress though the game. Here is an example of what that looked like:

https://api.achille.com/xmas/profile
{
  "name": "Chris"
  "bitcoin_address": "1G2zt786BsvKJXAvTamW3Bds64e6pcQBMx",
  "bitcoin_private": "L22zGSFr75Cix3h8BUKxfyRUTpxEnNC442pvjnwP2F2GNEppUKuc",
  "level_current": {
    "error": "",
    "id": 1,
    "message": "",
    "question": "<Question...>"
  },
  "levels": [
    {
      "level": 1,
      "name": "One",
      "prizes_left": 32,
      "winners": 3
    },
    ....
  ],
}

Done, now we have data, and a way to access and manipulate it.

Website

The website is not really my specialty, so it could be a little bit more polished, but I put together a simple HTML/Javascript/CSS website that allows you to walk though the questions, answer them, and also see the status of other things like your bitcoin balance.

[Shout out to Nora, my daughter, who helped me make some improvements, so it could atleast get to where it is!]

This is mostly done though some simple Javascript/Ajax which is calling the backend JSON/Python API to get all the data that it needs. It also have a couple other niceties like url rewriting which allows the urls to be nice and pretty (see original invitation for example) and to obscure that from the visitor. Not too much more than that, mostly just an answer and skip option which forward the data, and show the results to the user.

Done with second piece, so now we have a functioning website, but no prizes yet.

Bitcoin Scripts

You know a project is destined to not last long when part of it is held together with bash scripts…

One of the core pieces of game, was that when people did get things right, that they would earn some Bitcoin, so how was all this going to end up working? For efficiently, and really because it didn’t demand anymore like, as I said this was all done with Bash scripts.

Basically we start with a “bank” bitcoin account which has all the funds to be used for giving out during the game (side-note: See the starting idea for every crypto exchange that horribly failed, but doing it anyways…). I then created a Bash script which can call the correct command-line tools to then deposit X Bitcoin in Y Account. This is accomplished by doing the following steps every time we need to do another transaction:

  1. Check the “Bank” account and see if there have been any updates since the last time we have run. If there are then move all pending transactions to completed, if not, then just remember details about this source account.
  2. Create an internal pending transaction for placing X Bitcoin in Y Account. (This is as sample as a placeholder file in a particular format).
  3. Create a new Bitcoin transaction for all the pending transfers we are trying to accomplish. This creates a large command-line with exactly the right parameters and calls tx (from pycoin project). Then sign this transactions. This now represents all outstanding transactions we want to perform.
  4. Upload this latest transaction to the blockchain via https://blockchain.info/pushtx.

This script is then just called via the API when someone gets something correct.

Now really done (well, after tons of testing and bug fixes…)

Conclusion

This ended up taking me much longer than I expected, or really wanted to spend on it, but I am very happy with the results. While not pretty, it accomplishes exactly what I wanted, and is ripe for updates next year, which much less work.

People sometimes ask why I am so fascinated with Bitcoin… I am not sure if it will ever reach its full potential, but the answer is partially this post. How else could this have been done without something like Bitcoin? The ease at which I can just create some bits on my machine, anonymously post them to some random website, and just have it transfer money is amazing to me. In any other world I would need to write some ridiculously complicated API to interface with any financial institution, and it just would have never complete.

Wondering how people are doing in the game? Well, check it out right on the blockchain. Everyone one of these withdrawals is someone playing my game and winning…

https://www.blockchain.com/explorer/addresses/btc/13MU55NuURYjwQhPDS8REsVHu6GBzWwrvT

E-Ink Nameplate

My workplace has an open floor plan with small desk/cubicles for everyone on the team, and with such a setup we all have a small plastic nameplate with our name and desk location on it. It is useful for facilities and such for understanding where a particular desk is, but doesn’t get much other use.

Well, a couple weeks ago I changed desk locations. That combined with my curiosity of E-Ink display for years now, and exactly how they worked, got me inspired. I decided to replace my boring paper nameplate, with something a little more custom. Below is my MVP (minimum viable product).

Display

It all started with the display. After all, I have never played with one of these before and was curious to try it out. I found the Waveshare 7.5inch E-Paper E-Ink Display on Amazon, and decided to give it a shot. With some quick searches online I was able to discover that it had Raspberry Pi support, which was exactly what I was looking for.

I was pretty happy to see that this display supported red in addition to the basic black and white.

Raspberry Pi

After receiving the display, it only took about a night of playing with it and a spare Raspberry Pi I had sitting around to get it do some something interesting. I started with some of the sample code that they had, and made some small python modifications to print something pretty simple, with my name on it and the current date.

I could have went with something a lot more complicated (a mistake I have made many times before), but the point here was to really just prove it out, and to get a prototype working. So with that working, I was done with the application.

Case

My next task was to handle how I was going to display it. I originally thought something wood might be a good option, but I knew I just don’t have the skills to make something nice looking with any type of detail at all.

After thinking about it for a little while, I decided this would be a good opportunity to try another first…maybe I could 3-D print something? [Wait…wasn’t this supposed to be simple?] I had been wanting to print something simple from Thingiverse for a while, but I just have not gotten around to it, even though I have access to a 3-D printer.

Obviously nothing off the shelf is going to meet my exact needs, so I played around a little bit, and designed something using some custom measurements that I took, and also the specs from the display company. After a little bit of design, plugging it into the 3-D printer, and clearly some good luck, wallah, I had something that might actually work.

Final Construction

Taking the separate pieces, I put the display in the new case along with some good old epoxy to hold it in plate. I then added all the other components, added a USB cord to power it, and closed it on up (with some padding to hold other components in place).

Given that this is my first experience with E-Ink, and my first time 3-D Printing something, I am very happy with how it came out.

PS

Some lessons learned:

  • When 3-D printing, the bottom of the print is the “rough side”, and should not be your presentation side. (In mine, I made it the front…ooops)
  • Raspberry Pi’s are in extremely short supply right now (June 2022). A Raspberry Pi Zero W that you could have previously got for $10/$15 is now costing ~$80.

Home Office Upgrade: Wired Ethernet

Working from home, from my new “Home Office” (previously Guest Room) has worked fairly well, but the one area it has not worked well in is taking Video Conference Calls. While it usually works, I frequently will get part of the video call which is jittery video wise, or gets the audio dropped briefly. While this could just be seen as annoying, it is frequently a barrier to communicating remotely, and can be extremely frustrating.

I have a good internet connection, and a fairly decent wireless network, but it can not be avoided that wireless packets get dropped from time to time, and the performance is not fully reliable. This is especially true when others are gaming on the network or streaming videos. The solution is pretty clear, I need a wired connection to my office, so I can hard-wire my laptop into my home network.

The Problem

So, the solution is clear, a wired Ethernet connection to the room. The problem is that it is not easy to get to, for the following reasons:

  • The office is on the opposite side of the house from where the Internet connection comes into the house, about 50 ft away.
  • The room under the office is the garage, but it is fully finished, with no exposed studs, limiting access to above.
  • The office is also on the 1st floor, on a 2 story house, so there is no way to come at it from above either.
  • The wall I want to add it to, is an exterior wall, which has insulation, and also makes it very difficult to drill from below even if the studs were exposed.

So, basically there is no easy way to install an Ethernet Jack.

My usual go-to move, would be to identify the wall from below in basement, drill up through the floor in the wall cavity (separating the 2 rooms), and put a box in the wall attached to the wire fed from below. That wire could also easily be routed in the basement, because with nothing finished, it is fairly clean to route it along the joists.

Step By Step

To be honest, I had tried to find a solution for this before (for a printer), but it is now becoming more important that I do find a solution. After, further inspection, there is a bulkhead which may be a possible solution.

Bulkhead in Garage

The first step, can I get a connection from the office, down into this bulkhead? I thought, if I cleared a big enough space in the wall, that it would be possible to get a drill in there, and drill a hole diagonally from the cavity in the wall, towards the garage (away from the exterior). After clearing a hole in the sheetrock, and trying it out, it worked.

New hole in wall, along with existing outlet and coax connection.

Now that we can get a wire downstairs, the next step is to run it along the bulkhead. This took a while, and a lot of diligence, but with tons of work, I was able to feed a more solid guide wire down the bulkhead (this was assisted with a hole half-way down the length), and I was eventually able to pull the Ethernet wire along it.

Ethernet wire fed through bulkhead. Note the 4 wires (not one), 1 for computer, 1 for printer, and 2 for security cameras that will be another job later down the road.

Ethernet wire from bulk head, running into the rest of the basement.

With those steps behind us, the rest are fairly straightforward. The first is to route the wires to the Home Internet connection, and to clean them up with zip-ties, and patch them into the existing network switch.

Zip-tied cables all cleaned up.

Patch panel connected with 4 new Ethernet wires into switch.

The last step was to close up the existing hole, and to install the new jacks.

Wall opening with furring strips added to support sheet-rock, and insulation put back into place.

Closed up wall, just waiting for mud to finish it off.

Finished

Finally, 2 new network jacks in my office. One for my laptop, and one for the printer that was already there (previously using Wi-Fi).

2 New Network Jacks with patched up wall. Success.

Pool Controller Header Image

Pool Pump Controller

For the past 3 years our pool has been using one of the very common analog pool pump timers (eg. Intermatic T104R3 Time Switch) to turn the pump on day in and day out, but that all came to an end last week. One day I noticed that the pool was never turning off, and the time was not changing on it. Opportunity knocks!

Overview

Time to get rid of that old analog timer, and to replace it with a new digital device, one that can be controlled remotely and can be queried at any time.

New Pool Controller: Arduino and Relay Module

Components

As sometime who tinkers from time to time, I just happened to have everything I needed on hand to make this a reality. The key were the following 2 components:

By putting these 2 together, we get exactly what we want. A remotely controllable switch to turn the pump on and off.

Install

The existing timer came in a nice waterproof case, so the first step was to remove that old broken timer from the existing case, of course remembering to shut of all associated power first.

Existing Analog Timer

With the timer removed, there was just enough room to install the Arduino and Relay Module. These were installed in such a way to make room for each other, and to also allow for upgrading of the firmware in the future (which ended up being needed immediately). After that was done:

  • The existing braided power lines were connected to the relays with some new solid core power wires using wire-nuts.
  • The Arduino was wired up to the relay module.
  • For simplicity reasons, power was delivered via an external power transforming and a nearby outlet.
  • Network was supplied via a short Ethernet cord, and a jack which was previously installed for a Network Access Point.

Arduino and Relay Module Installed

All the necessary components are now in place.

Software

This is one of the areas in which I really won. Years ago, I was working on putting together software for an Arduino based project on which I could control the lights near my pool. The concept was to expose an HTTP interface which would turn the lights on and off. It was a simple pivot, to change this to control the pool, and a couple more HTTP endpoints to accommodate that.

With the updated code, the Arduino starts up, grabs a Dhcp address on the network, and then exposes the following endpoints:

  • / – Status page which reports the current state of the controller
  • /pump/off – Turns the pump off
  • /pump/on – Turns the pump on
  • /uptime – Returns uptime of the device (this was used mostly for debugging)

This code was all written in C++, and uploaded via a serial connection.

As you may have noticed, there is nothing turning the pool on or off at this point. That was achieved with a simple cron script on a local server that I use for many other things. This is what that looks like:

  # Pool Pump
  ###########
  # 8am-12pm and 3pm-7pm daily (8h)
  #
  0 8,15 * * * curl -m 5 http://10.13.0.216/pump/on
  0 12,19 * * * curl -m 5 http://10.13.0.216/pump/off

Uploading latest firmware to the Arduino

With that, the software is complete.

Summary

All in all, I am very pleased with how this came together. I would say that it came down to equal parts luck (having the right components on hand), and previous work (having most of the software complete). There was a little bit of debugging to resolve a couple small issues, but after that, new working pool pump controller. All in all, very satisfied.

Cutting the Cord

This motivation comes from years before “cutting the cord” was cool. For years I have wanted to get rid of cable, I am just tired of the excess fees that the cable companies charge, and how the rate just goes up month after month. Don’t get me wrong, they do deliver a good product, but to me it is not worth the price, and I don’t appreciate how they have no qualms with just raising the prices month over month.

Free TV

As you are probably aware, depending on where you live there are many great TV channels that you can receive over the air. For me, most of what I watch is prime time TV on the major channels, so this matches pretty well. You can search online at www.antennaweb.org for what would be available to you. For me, in the Boston area, this includes ABC, NBC, CBS, PBS, FOX, WB, and much more other minor content.

Tivo

While I am not a huge fan of cable, I have really come to love Tivo over the years. They have treated us really well over the last 15 years with our various Tivo devices, and have a great interface that works well. For cutting the cord, I ordered a new Tivo Bolt, which handles both Cable and also TV over the air.

Antenna

I had originally had a smaller powered GE antenna, but given that I am over 20 miles away from most stations and it didn’t consistently pull in all the major stations, I decided I must go with something more powerful. After doing some research, I ended up with the GE Pro Attic Mount TV Antenna. It ended up coming in a fairly small unassuming box, but after assembling and installing it, it performed beautifully.

Antenna installed in Attic on beam

Antenna installed indoors in attic pointing towards the majority of stations

Cord Cut

The finished product is working great. My antenna gets great reception, and when paired with the Tivo DVR provides a great service for those channels. In addition to that, Netflix and Amazon are a great compliment providing everything I could need.
 

Network Upgrade – Attic

It finally came to that point, where you have tons of cables sitting around and the mess comes to a breaking point. My home network is fairly complicated including a rack with various components, but for this article we will concentrate on the connections that interconnect in the Attic.

I have one main Ethernet line that goes from the switch in the basement to the attic, and from there it feeds a couple bedrooms and a couple Cisco Access Points using PoE. This setup was initially done over a little bit of time, adding one room after another, and one Access Point after another, which lead to wires scattered throughout the attic. My goal here was to fix all the clutter and clean that up.

My game plane was the following:

  1. Reroute all the random lines, and put them in the wall thus removing the clutter.
  2. Terminate all the existing lines on a patch panel (Cable Matters 12-Port), along with the main line from the basement.
  3. Install a network switch with PoE support (TP-Link 8 Port PoE Switch), and clean up wire connections.

Well, it is all done, so here are some pictures of the rerouted lines, and the new patch panel/switch installed.

Network Wires Routed in Studs

Patch Panel Installed with Switch